
Getting started
A 30-minute walk-through of your first day on SmileDesk. By the end, your staff will be in, a few patients will be loaded, and your first booking will be on the day board.
Before you start
You should already have:
- A confirmation email from SmileDesk with your clinic address — something like
darlingdental.smiledesk.in. - An owner login (the email you signed up with).
- Your list of staff — names, mobile numbers, and what each person does (doctor, receptionist, assistant).
- Optionally, an Excel/CSV of your existing patients — name, phone, DOB, gender, address. Anything missing can be filled in later.
Step 1 — Sign in
Open https://<yourclinic>.smiledesk.in/login in Chrome, Edge, Safari or Firefox. Enter the owner email and the password you set at sign-up. You will land on the Dashboard — today's appointments, pending requests, outstanding balance, low-stock count.
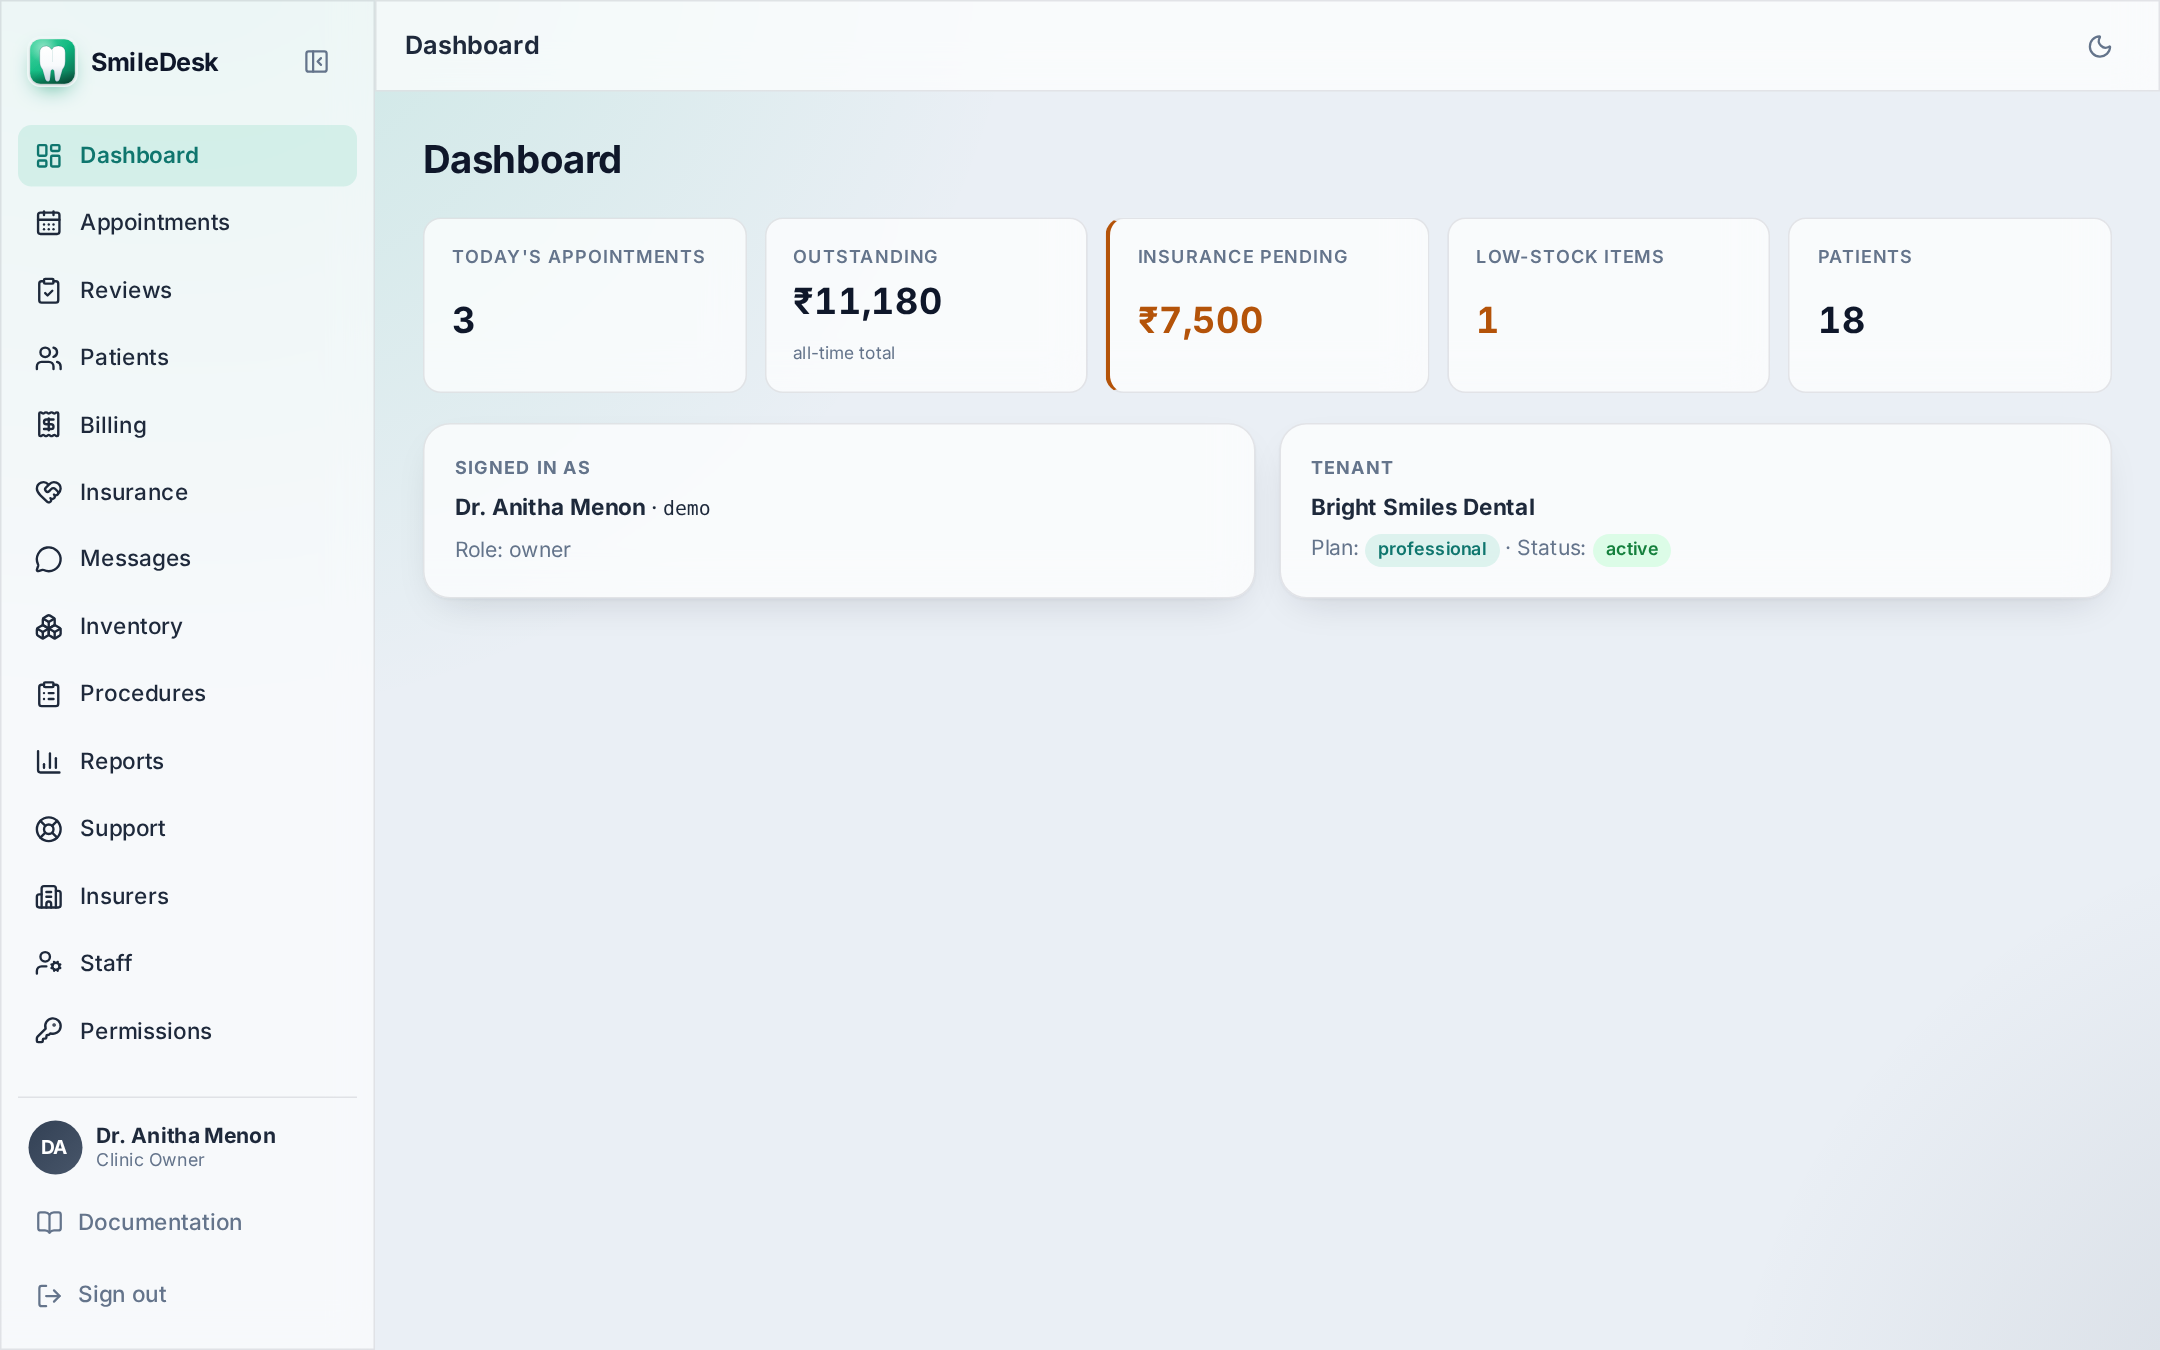
Bookmark the URL. The clinic address never changes; put it on the desktop of every reception PC.
Step 2 — Add your staff
Open Staff from the sidebar (only Owner / Admin see it). Click Add user, fill in name, email, mobile and role, and choose a starter password (they can change it later from Profile).
- Go to Staff → Add user.
- Type the person's name. Use their real name; it appears on receipts and audit rows.
- Enter email and mobile in
+91 9xxxx xxxxxformat. - Pick a role: Doctor, Receptionist, Staff, Admin.
- Set a starter password and click Create. Share the password with the person via SMS or in person — never over email.
Owners can create Admins; Admins cannot. If you need another Admin, the Owner has to add them. Roles are described in detail on the Admin page.
Step 3 — Set your chairs and doctors
Every appointment sits on a chair (an operatory) and is assigned to a doctor. Both are simple lists.
- Chairs — under Admin → Chairs. Give each chair a short label ("Chair 1", "Ortho room"). Two chairs = two parallel columns on the day board.
- Doctors — anyone with the Doctor role automatically appears in the doctor dropdown.
Step 4 — Import patients from Excel
If you already have patient records in a spreadsheet, you can bring them in one at a time or ask us for the bulk-import CSV template.
Manual entry — fastest if you have fewer than ~50 patients:
- Open Patients → New patient.
- Type the name and mobile (mandatory), plus DOB, gender, blood group, address (all optional).
- Under Medical history, note allergies, chronic conditions and current medications — these are surfaced at the top of every chart.
- Click Save. SmileDesk assigns the next P-code (P0001, P0002, …).
Bulk import — for larger lists:
- Email support@poruz.com asking for the patient-import template.
- Fill the CSV:
name, phone, alt_phone, dob, gender, blood_group, address, medical_history. - Send it back — we will load it into your tenant and confirm the P-code range.
Duplicate detection is on phone number. If a phone already exists, the row is skipped and reported back — nothing is overwritten.
Step 5 — Load your procedure catalogue
Under Procedures, add every procedure you offer with a price. This drives the treatment plan and the invoice line items.
- Short procedures ("Scaling", "RCT — molar", "Composite filling — Class II") plus a price in ₹.
- You can edit the price later without breaking old invoices — issued invoices freeze the price at the time of issue.
Step 6 — Book your first appointment
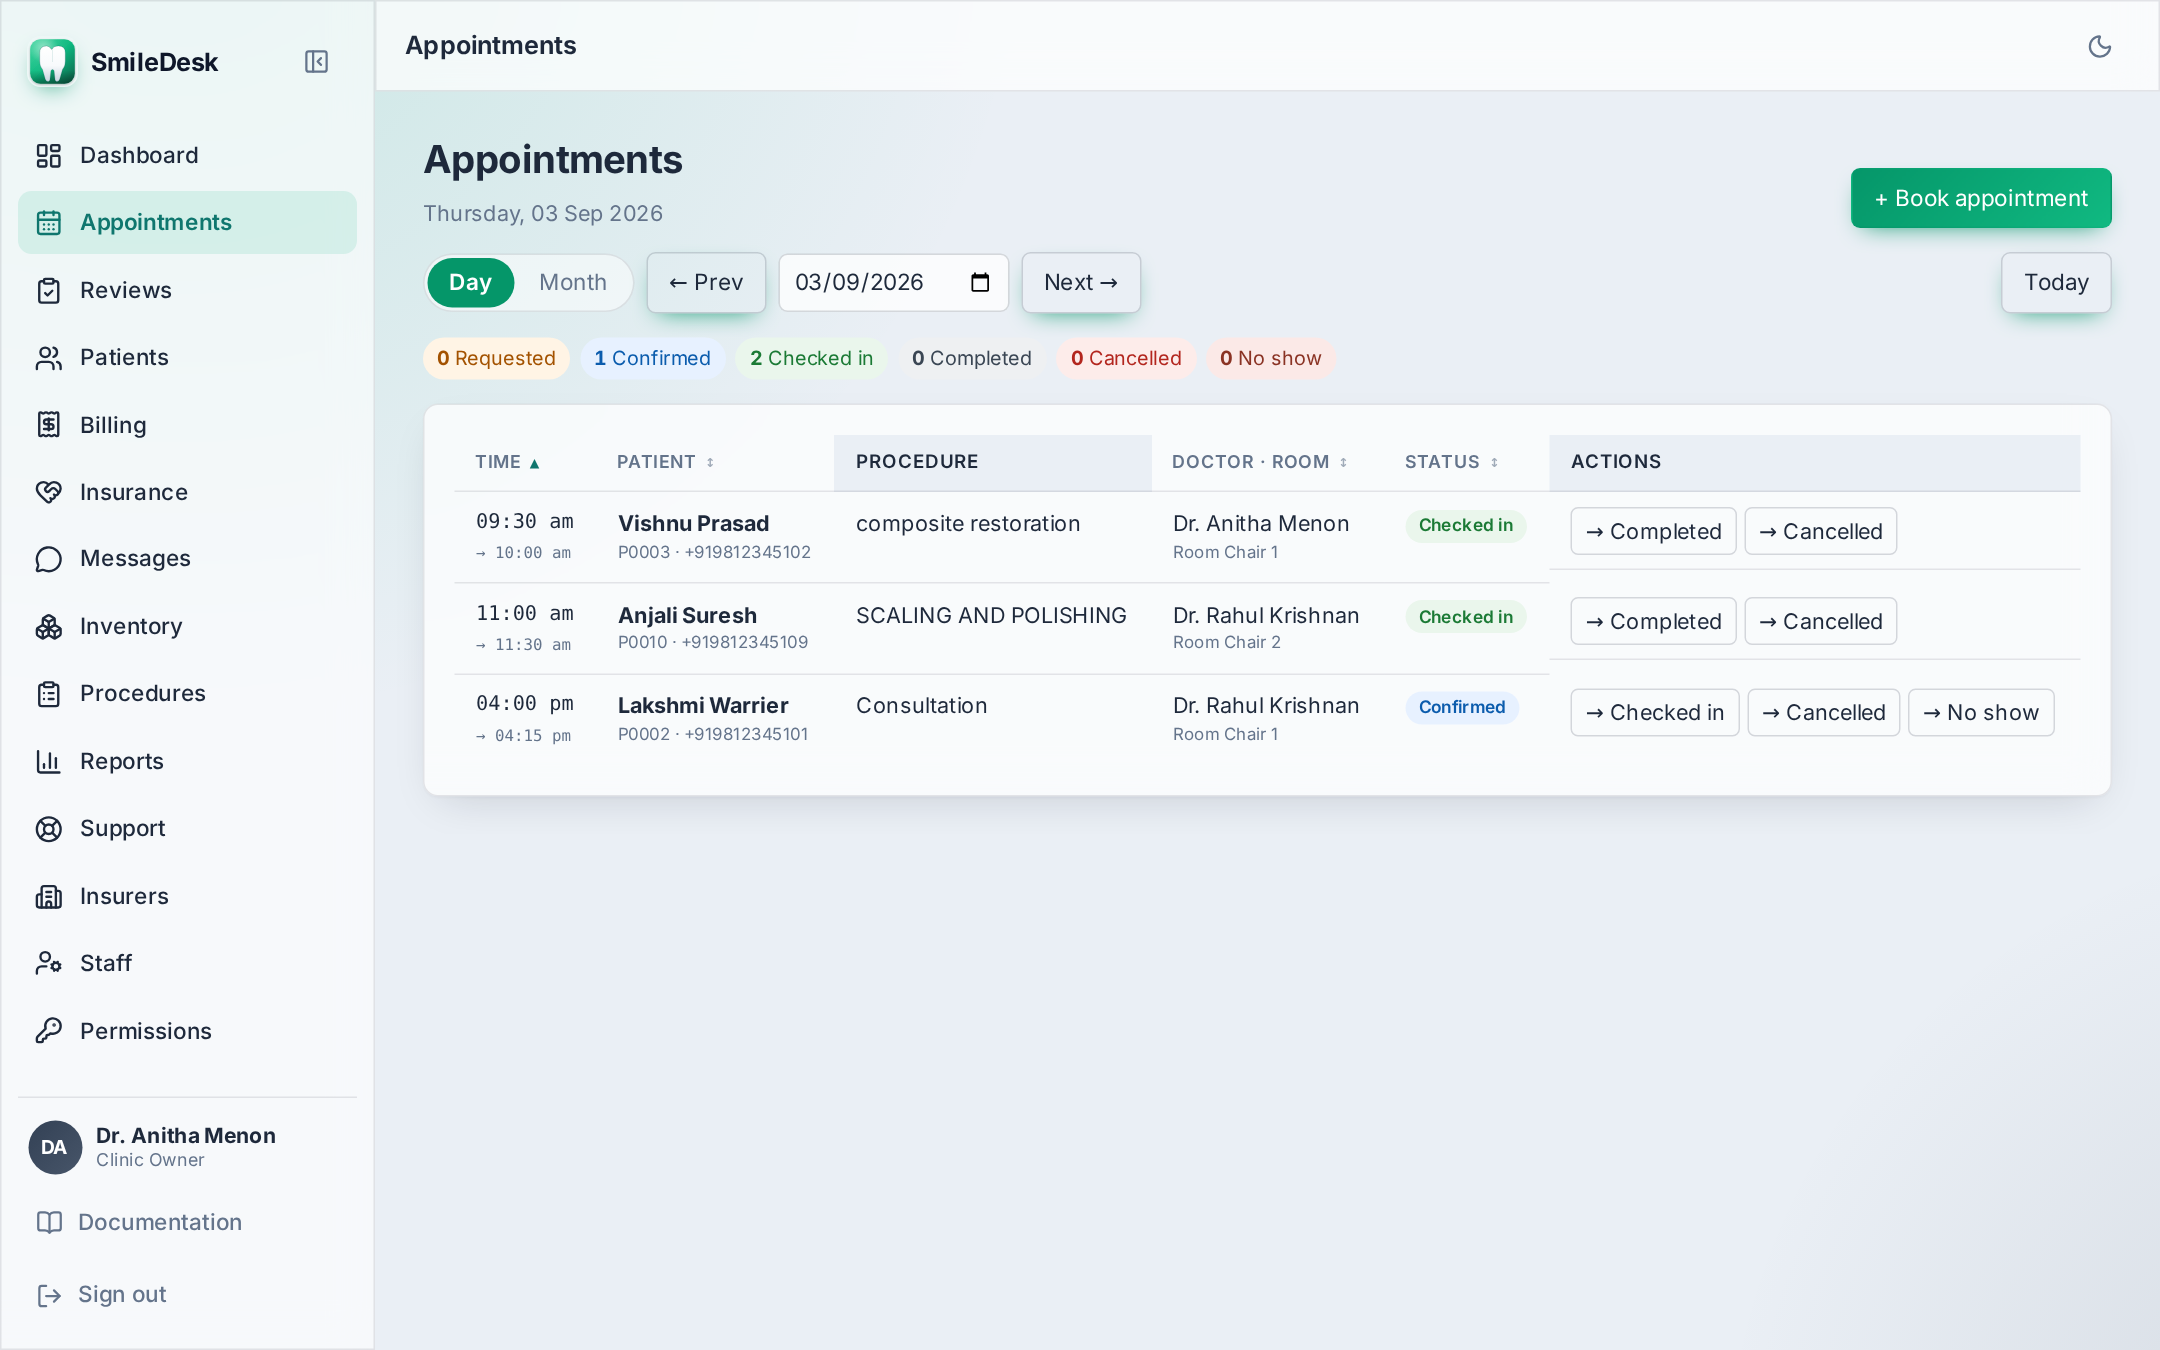
- Open Appointments. You land on today's board.
- Click New appointment.
- Search the patient by name or phone. If they are new, click Register new patient in the same dialog.
- Pick a chair, a doctor, the start time (IST) and duration.
- Choose the procedure(s). SmileDesk warns you if the chair or doctor is already busy in that slot.
- Save. The appointment goes to Confirmed and — if WhatsApp is on — a confirmation is queued to the patient's mobile.
Step 7 — Switch on WhatsApp (optional but recommended)
WhatsApp reminders cut no-shows dramatically. It takes about 15 minutes to set up your Pulse number — see the WhatsApp page for the exact steps.
Common pitfalls on day one
- Typing the phone with spaces. Use
+91 9xxxx xxxxxor just the 10-digit number — SmileDesk normalises it but if you paste from Excel, remove hidden non-breaking spaces first. - Skipping the chair setup. Without at least one chair the appointment form cannot save.
- Using the same login for multiple staff. Don't. The audit log will show one person doing everything, and deactivating that account logs everyone out. Give each person their own login — it takes 30 seconds each.
- Forgetting the browser tab is per-user. If you switch users on the same PC, sign out first from the footer — otherwise the next person is signed in as you.
Stuck on any step? A real human replies within a business day.
Contact support →